| You can connect to
the CCHosting.net SQL Server though SQL Server Enterprise
Manager which is included with MS SQL 7.
Open the Enterprise Manager on
your local computer and select New SQL Server Registration.
Click OK to go on to the next page.
You will be presented with a
screen similar to the following:
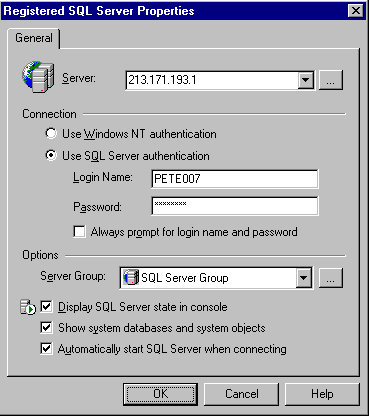
Enter the IP Address of the SQL
Server in the Server box as this will be the server we are
going to connect to. Switch the connection method to Use
SQL Server Authentication and enter the username/password
you set on your SQL Server database in the CCHosting.net
Control Panel. It is left optional to yourself whether or
not you have Always Prompt For Login Name and Password enabled.
Next click OK.
If you receive an error (for
example "Specified SQL Server Not Found") then you will
need to switch the protocol you computer is using to connect
to the SQL Server. Ensure this mode is set to TCP/IP - this
can be changed using the Client Network Utility.
If a successful connection is
made, you should be able to expand all the databases installed
on the SQL Server. The only database you will be able to
access is the one you set up. To add a new table to the
database, expand the Console Root to display your database
and right click Tables.

You will then be asked to specify
a name for the new table. After entering the name, you will
be put into the design mode of the table.
|


